- Students can view their plans, including goals, notes, progress, and more.
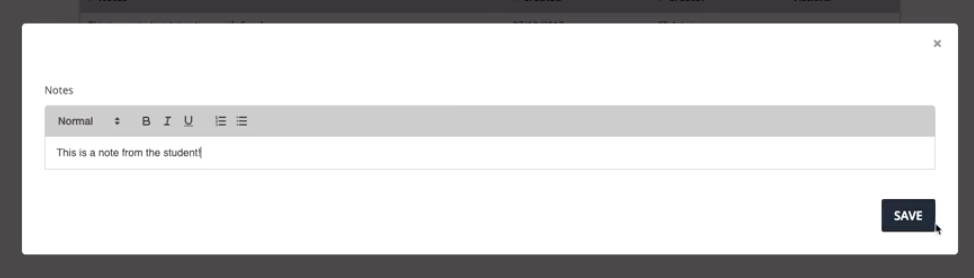
- Students can add notes, facilitating dialogue with multiple teachers and support staff.
- Students can upload documents, promoting ownership and increasing efficiency.
Actions needed by the Pivot Administrator:
| Steps | Description | Screenshot |
|---|---|---|
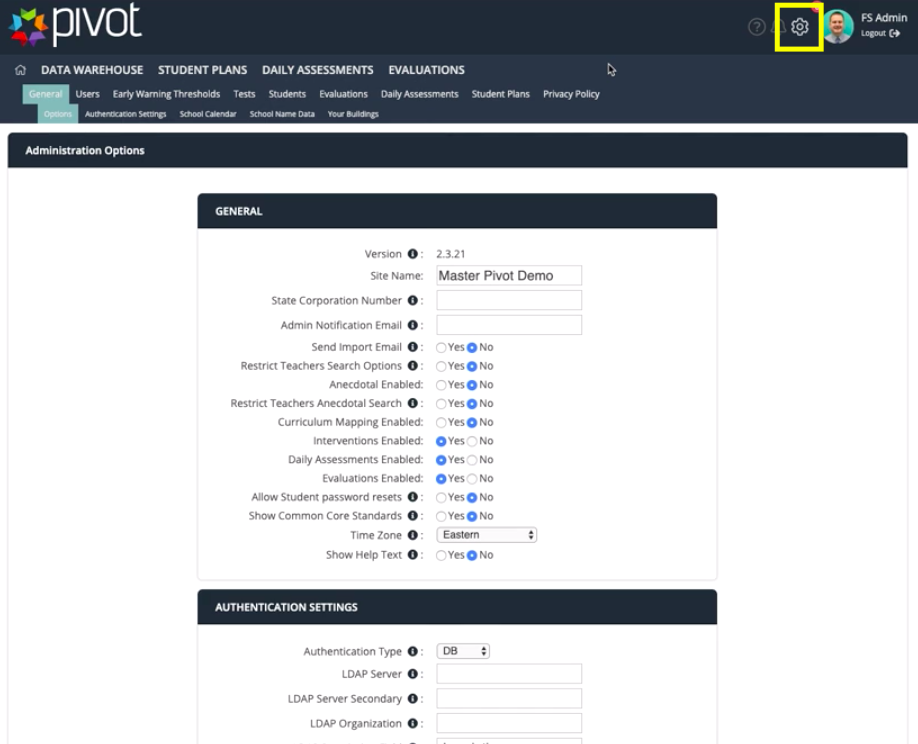
| 1 | Login to Pivot account > Navigate to the gear icon |
|
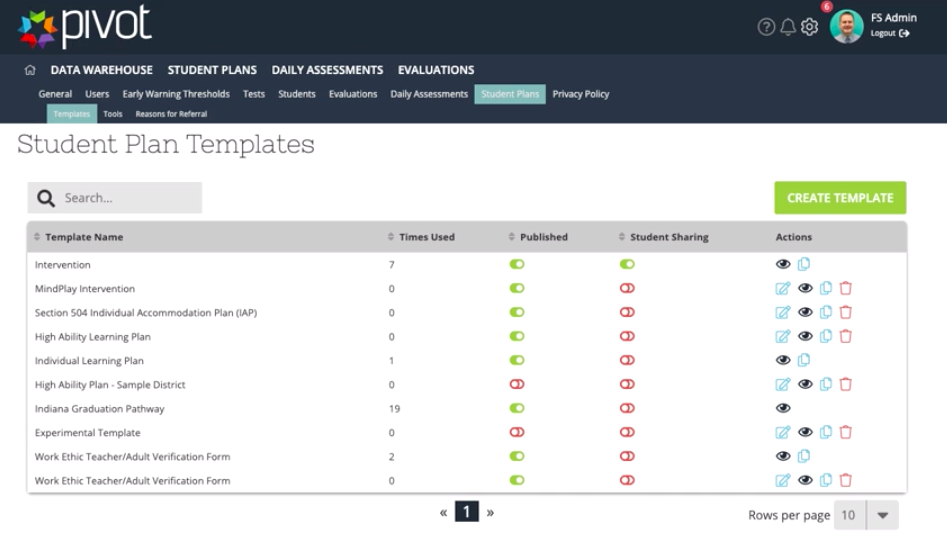
| 2 | In the second row, select Student Plans |
|
| 3 | You will see a list of all of the templates in your district's site |
|
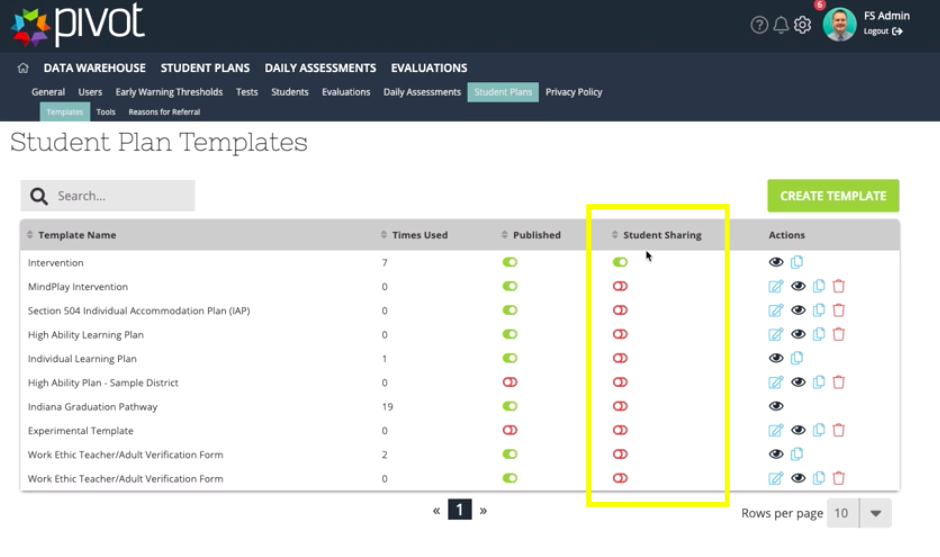
| 4 | To enable the ability to share a students plan: The Admin must designate the template as sharable using the Student Sharing toggle |
|

Creating a Student Plan:
| Steps | Description | Screenshot |
|---|---|---|
| 1 | Hover over Student Plans > Dashboard |
|
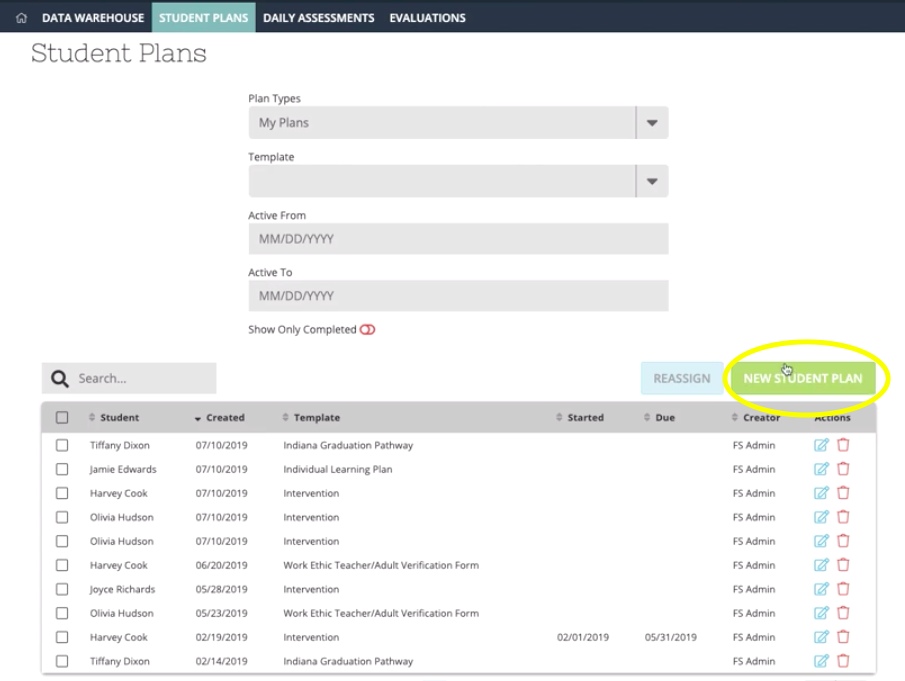
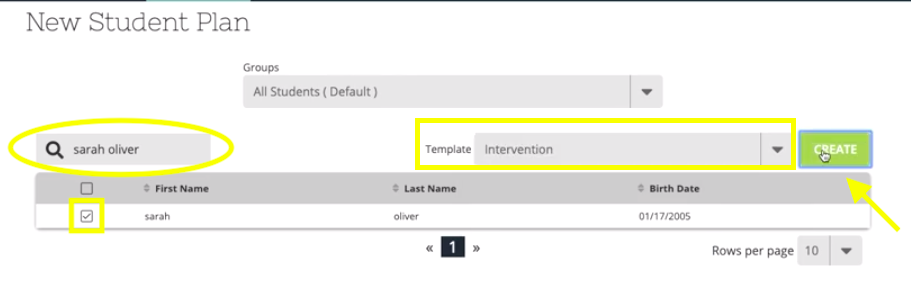
| 2 | Student Plans Dashboard > New Student Plan |
|
| 3 | Search for the student > Select the student Choose the correct template > Create |
|
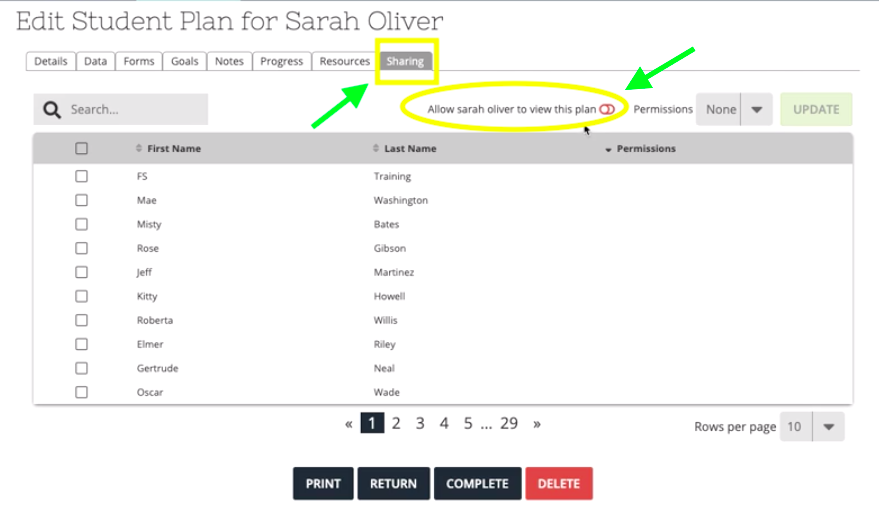
| 4 | Once you have created the new student plan Go to Sharing Tab > Switch toggle to allow the student to view this plan |
|
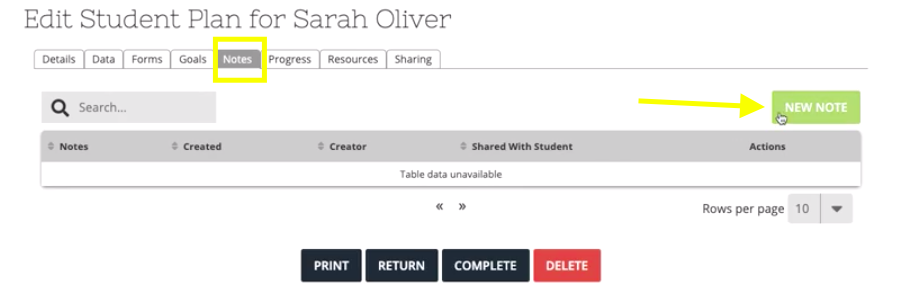
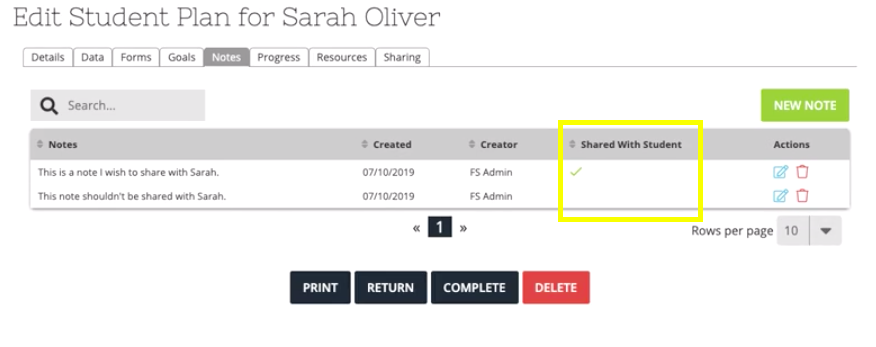
| 5 | To create a new note: Go to the Notes Tab > New Note |
|
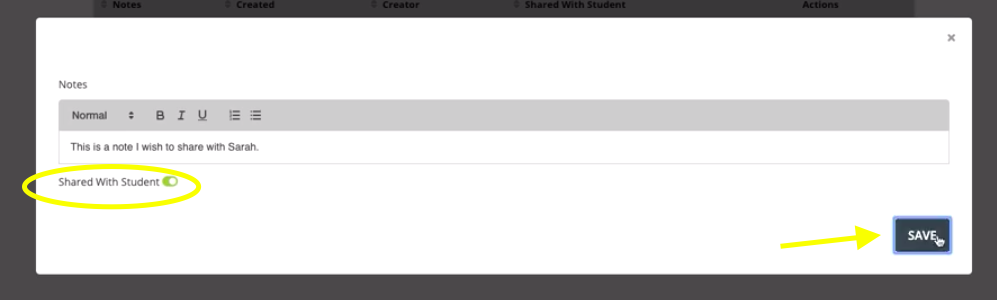
| 6 | Decide whether or not you would like to share your note with the student To enable sharing > switch the toggle to green > click save |
|
| 7 | You can see if the note is enabled to be shared by looking for the green check mark in the shared with student column |
|

Student View:
| Steps | Description | Screenshot |
|---|---|---|
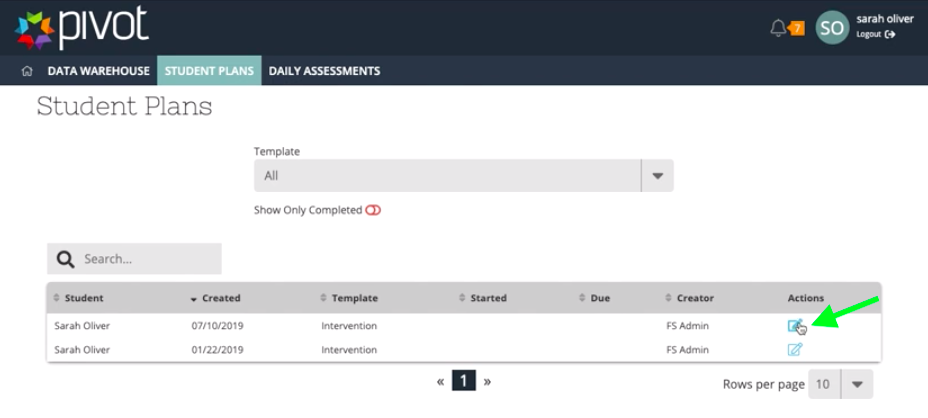
| 1 | Login to student account > Hover over Student Plans > Dashboard Find the plan you would like to view > Click on the blue paper icon |
|
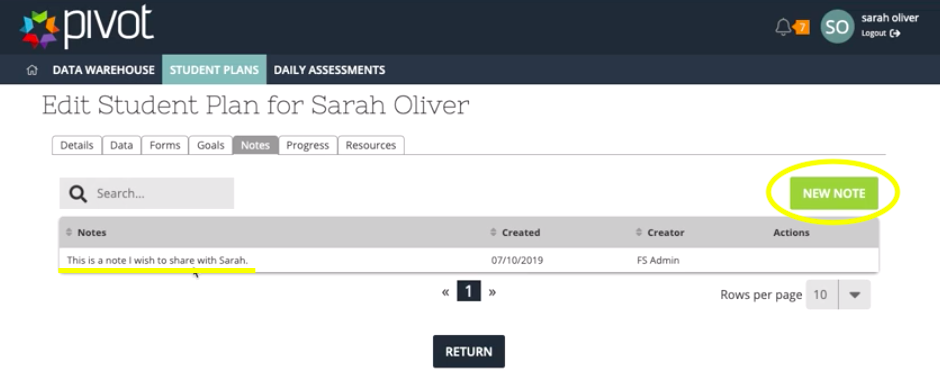
| 2 | Students can view notes that were enabled for student sharing To create a new note > click on the green button |
|
| 3 | Students can add notes, facilitating dialogue with multiple teachers and support staff |
|
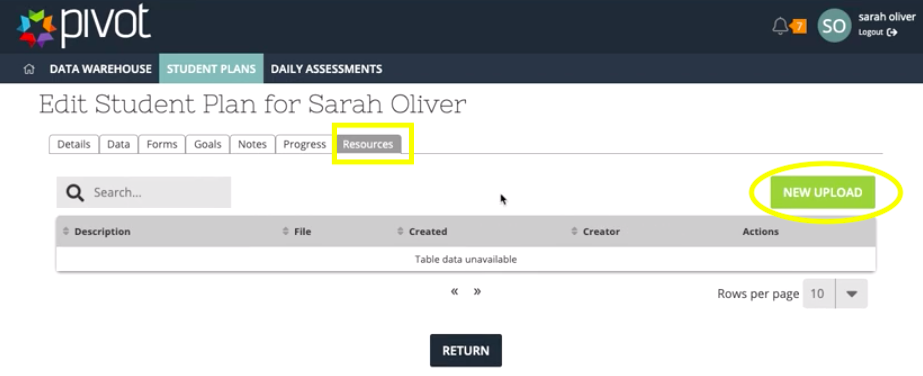
| 4 | Go to Resources tab to upload new documents Resources Tab > New Upload |
|
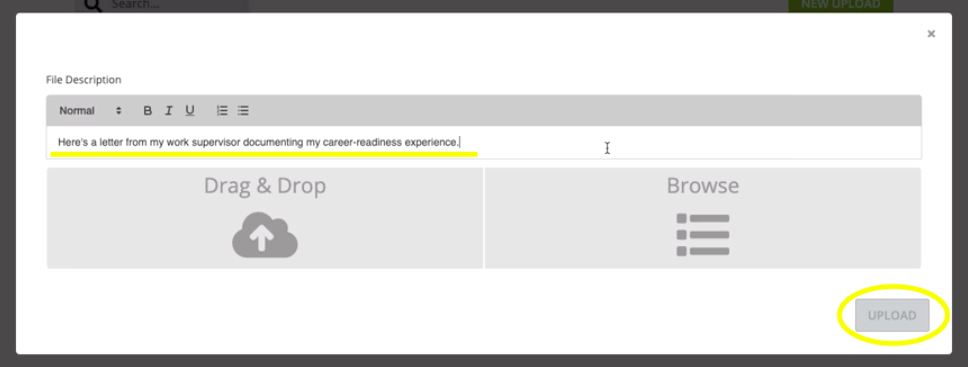
| 5 | Students now have to ability to add a document and type a file description to upload to their student plan |
|
...