[ARCHIVE] Create a Group
*You are viewing an archived guide. Please click this link for an updated guide.*
Steps | Description | Screenshot |
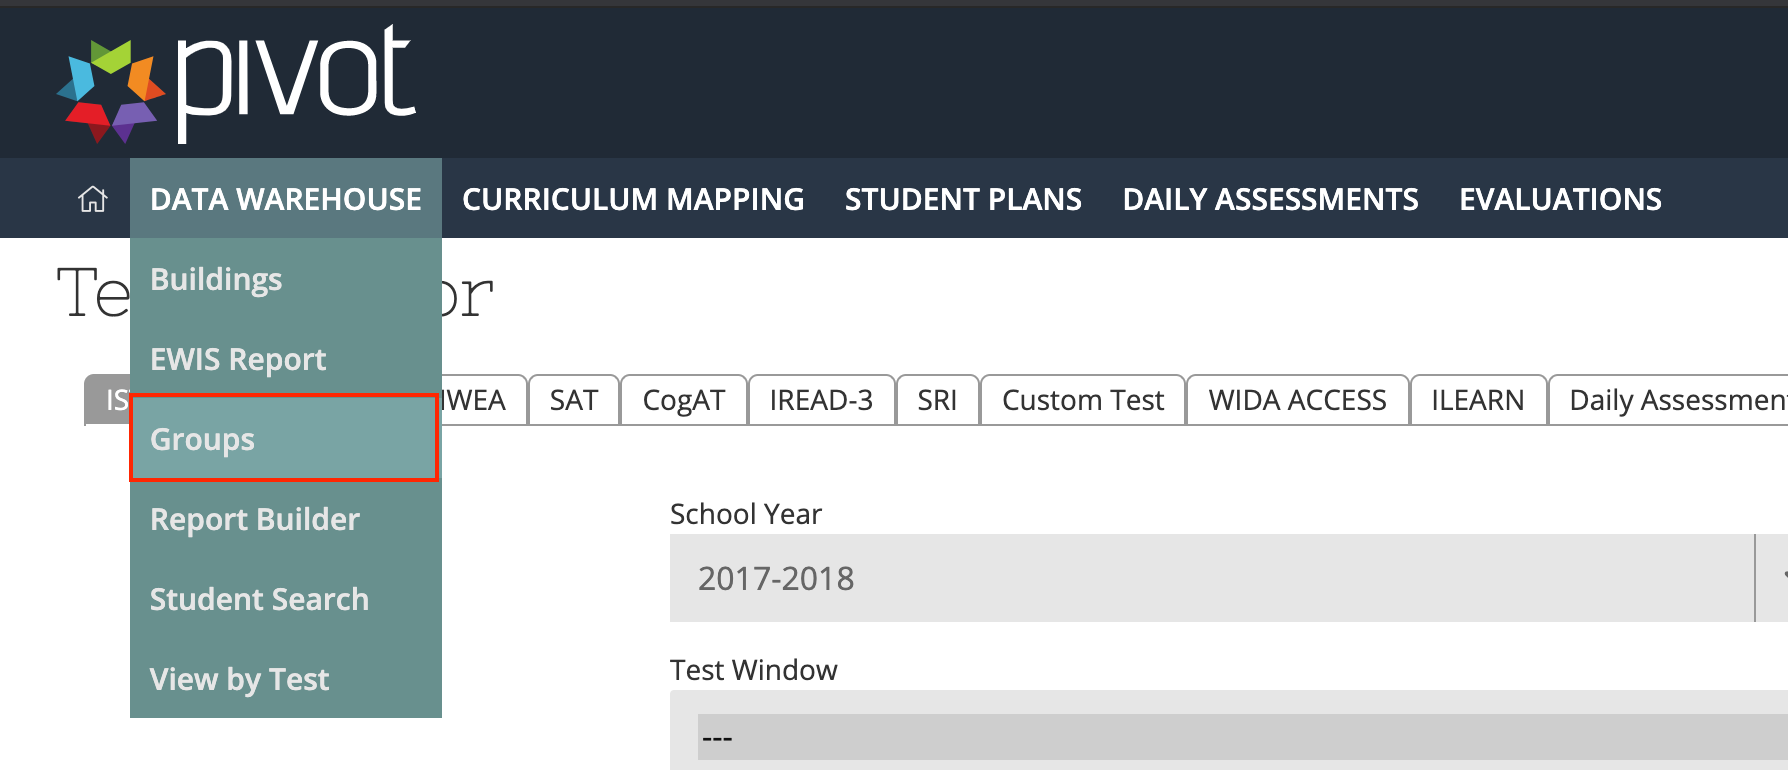
1 | *A roster file is required to create a group with this method. Select Data Warehouse>Groups from the drop-down menu. |
|
2 | Click Add Group |
|
3 | Type in the name of your group>Save Group |
|
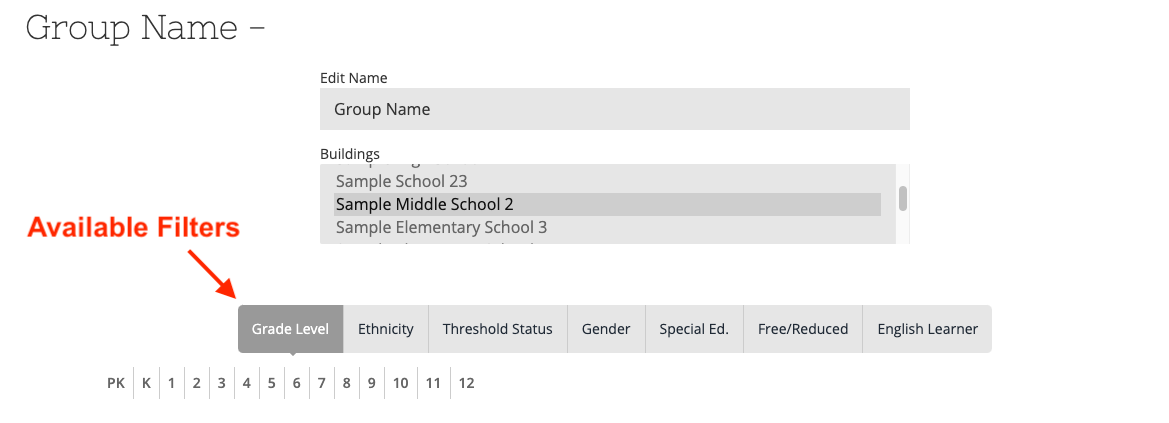
4 | On the Student Selection page, you can filter by building (if you have access to multiple buildings). Then you can hover over our additional filter options to narrow your results further. |
|
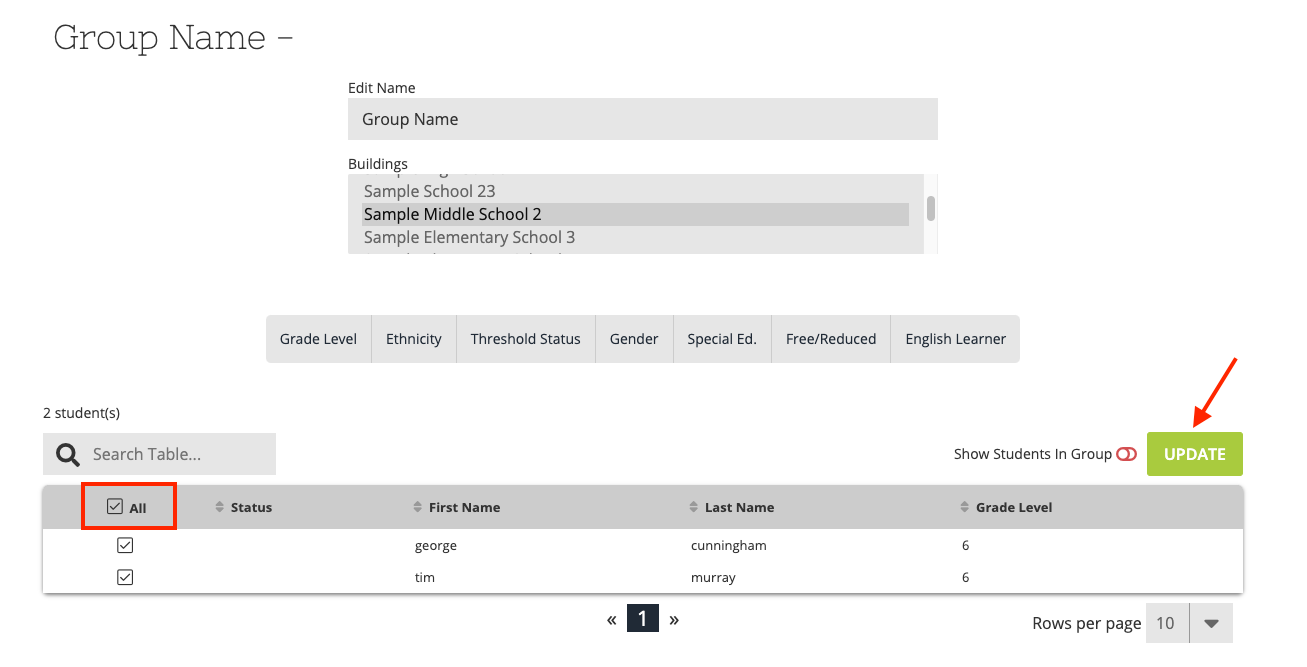
5 | In the table below the filter, you will see your list of students that fit the criteria you selected. You can check the box next to individual students or check the box in the header row next to All to select all of the students in your filter. After you have selected your students, click Update. You can adjust your filters and repeat this process to complete your group. |
|
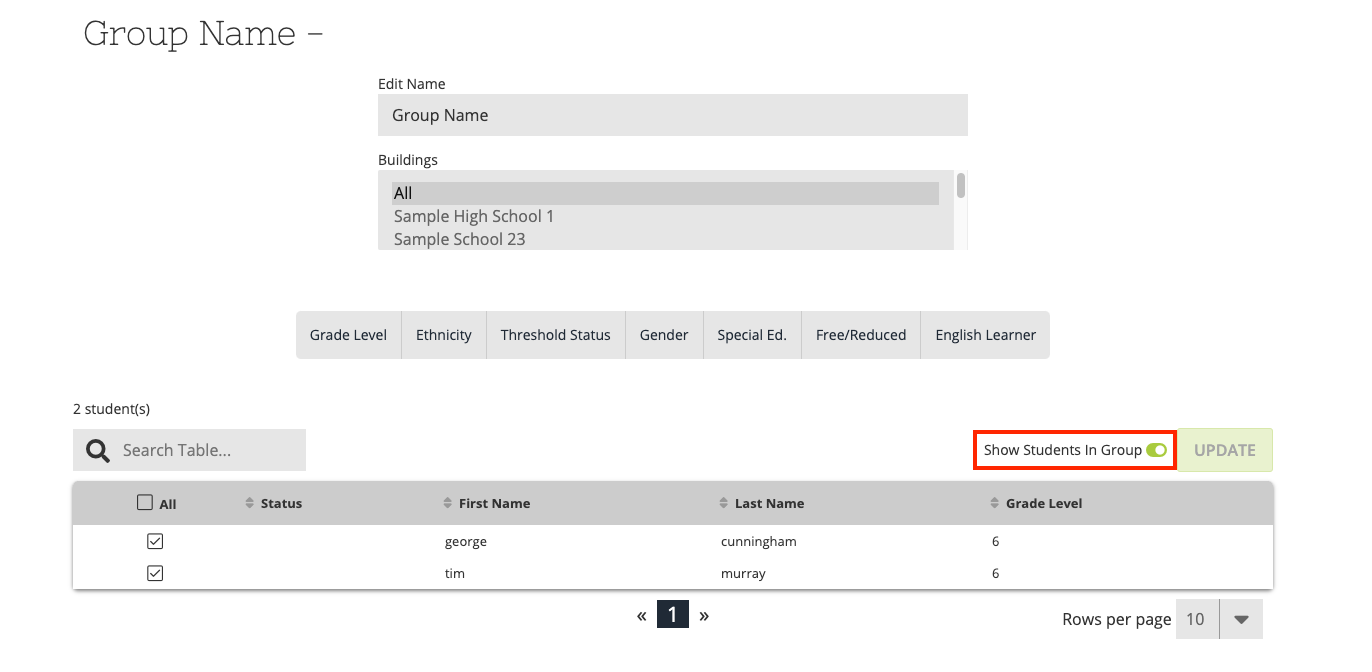
6 | To modify your Group, turn on the toggle Show Students in Group to display the student you have selected. To remove students from the group, deselect the box next to the student's name and click update. |
|
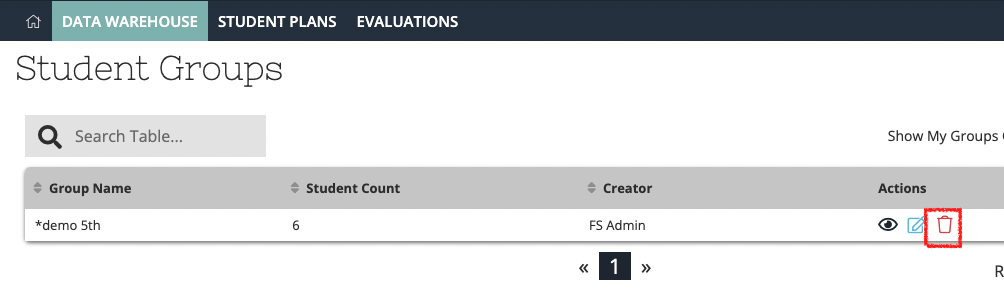
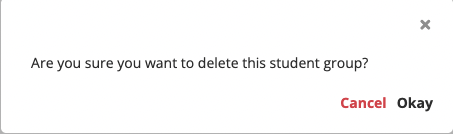
| 7 | To delete a Student Group, click the red trash can icon under the actions column. You will be asked to verify that you want to remove the group. Choose "Okay" to delete the group. |
|