[ARCHIVE] Collect Evidence
*You are viewing an archived guide. Please click this link for an updated guide.*
Step | Description | Screenshot |
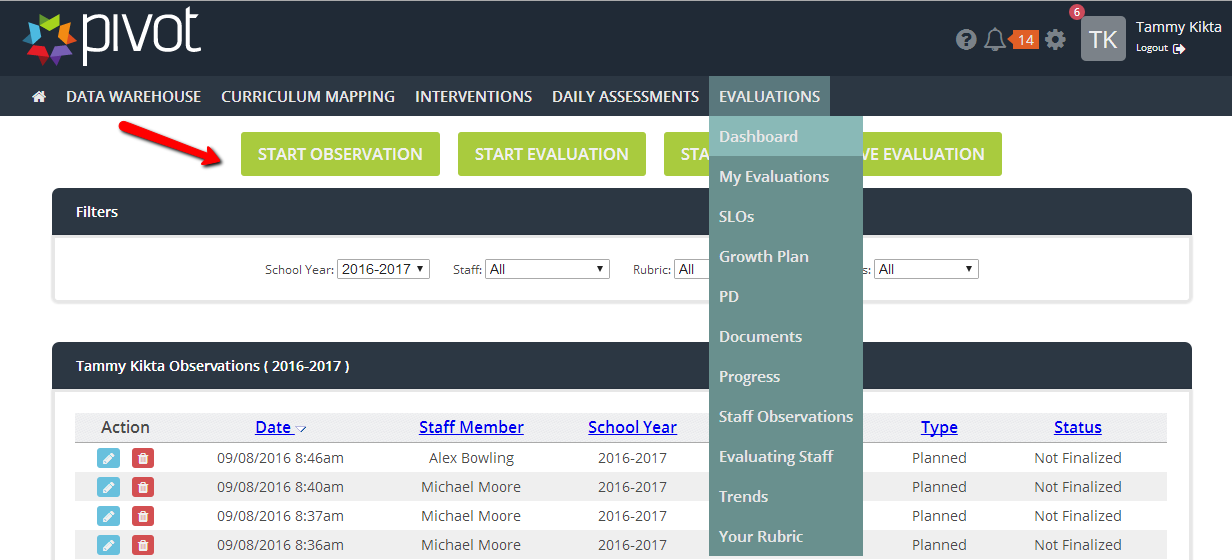
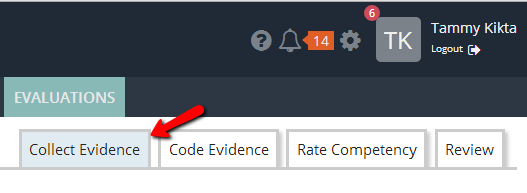
1 | Hover over Evaluations > Select the Dashboard tab. Click the green Start Observation button. Select the information for this observation. (See Start or Schedule Observation User Guide.) The Collect Evidence tab on the right side of the screen should be highlighted blue. |
|
2 | Verify the information you selected for the observation by clicking the arrow. *Note* The Start Timer feature is optional. The selected information displays. |
|
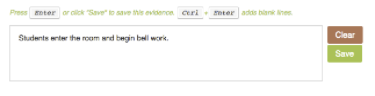
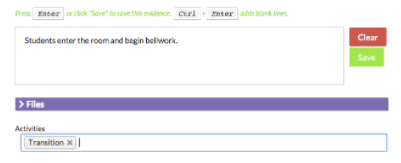
3 | Scroll down to the Collect Evidence textbox. Begin scripting. To save click the green Save button or hit return. |
|
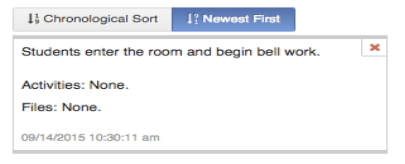
4 | Scripted notes appear on the left side as a time-stamped evidence note. |
|
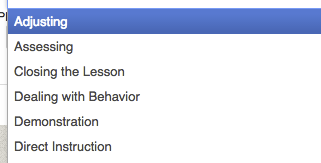
5 | To pull down a list of commonly observed activities, place your cursor in the Choose Activities box and click. | |
6 | Click the activity you wish to add as a note. |
|
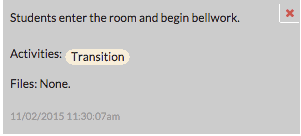
7 | The note appears on the left. | |
8 | To add an activity to an existing note, click on the note. The note is now gray. |
|
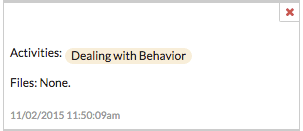
9 | Click on the activity you want to add. Click the Green Save button. |
|
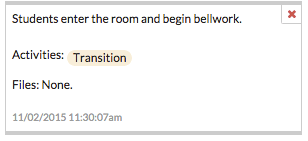
10 | The activity now appears on the evidence note. |
|
11 | To add a Phrase or Indicator, click on the Phrase you want to add. It now appears as a note on the left hand side. *Note* Utilizing Indicator Text is a district decision. This feature may be turned on or off by the System Administrator.
|  |
12 | To attach a file, click on the evidence note to which the file is associated. The note is now gray. |
|
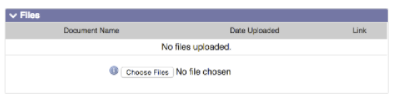
13 | Click the arrow in front of the word Files. Click Choose Files. Locate your file. |
|
14 | The Document Name and Date Uploaded are now displayed |
|
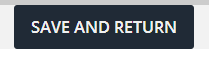
15 | To save your evidence notes and return later, click the Save and Return button located below the scripted notes. |
|